Zoiper
Connect the Zoiper softphone on Windows, Mac, iPhone or Android to a SIP device on your PBX.
Zoiper is a free third-party softphone for Windows, Mac, iOS and Android. You connect it to a SIP device on your PBX. Some Zoiper features, such as phonebook import, chat and push notifications, need a paid Zoiper licence, which isn’t part of your PBX service.
Before you start
Section titled “Before you start”- Add a SIP device to the person’s User under Device configuration, and click Apply configuration.
- Open Devices at the top of the PBX tab and select the device. Keep its SIP credentials open: Domain, Username and Password.
The Domain shows the server address, a colon and the port. Copy it exactly as shown, including the port.
If Transport protocol shows TLS, TLS encryption is on for your PBX. The port in the Domain is then different, and you must set the app to use TLS instead of TCP, with SRTP (shown as Media encryption).
For the Zoiper mobile app, the device’s settings also have a QR code under Zoiper settings. It works with the mobile app only; on a computer, enter the SIP credentials.
Set up Zoiper on Windows or Mac
Section titled “Set up Zoiper on Windows or Mac”-
Download Zoiper from zoiper.com for your operating system and install it with the standard settings.
-
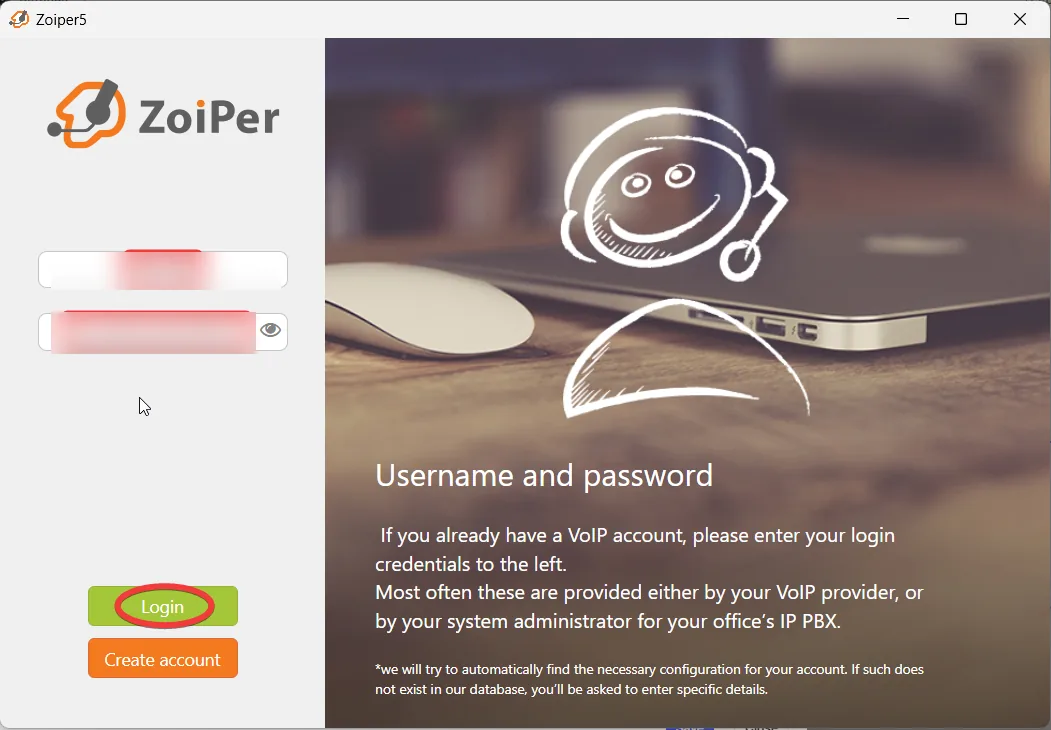
Open Zoiper. Enter the Username in the first field and the Password in the second, and click Login.
-
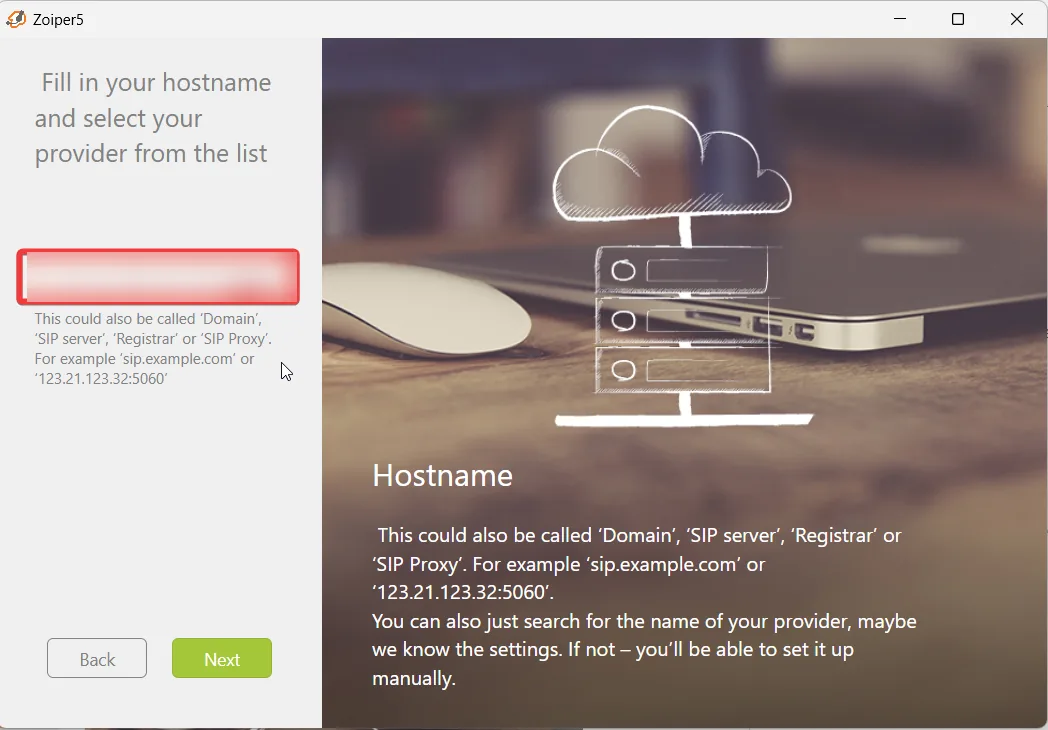
In the hostname field, paste the Domain, including the colon and port. Click Next.
-
Skip the authentication and outbound proxy step.
-
When Zoiper tests the connection, choose SIP TCP.
If you use Zoiper 5.5.7 or later, check the codecs to avoid audio problems:
- Open Accounts, select the account and click Advanced.
- Under Audio codecs, remove any G.729 codecs from Selected codecs. The PBX supports Opus, G.722, G.711 a-law and G.711 mu-law.
Set up Zoiper on Android
Section titled “Set up Zoiper on Android”- Install Zoiper from Google Play and open it.
- Under Account setup, enter the Username and Password and tap Login.
- Paste the Domain into hostname or provider, including the port, and tap Next.
- Tap Skip on the authentication and outbound proxy step.
- Choose SIP TCP.
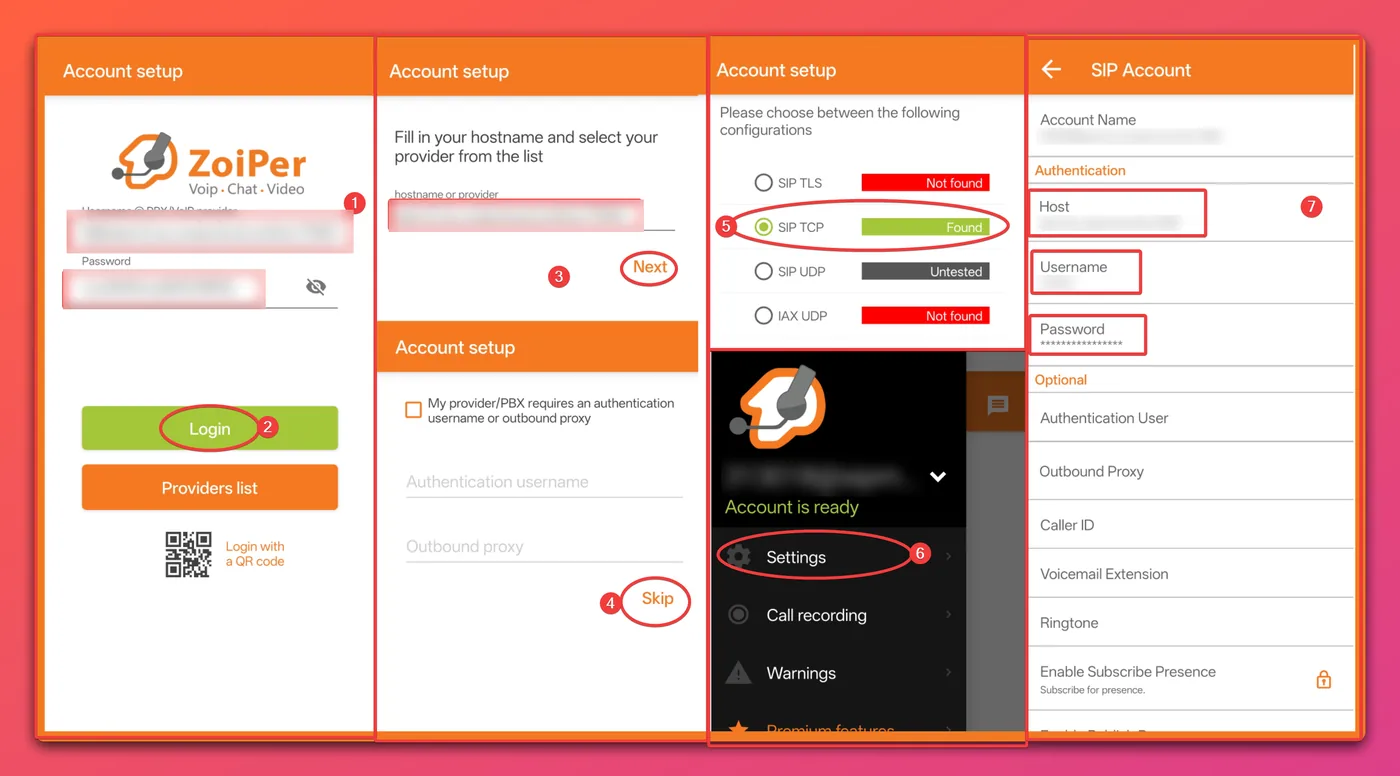
If you’ve used Zoiper before, open Settings, choose your account and enter the details under SIP Account instead.
For better reliability, open Settings › Network Settings and review the options there. Some need Zoiper Premium.
Set up Zoiper on iPhone
Section titled “Set up Zoiper on iPhone”- Install Zoiper from the App Store and open it.
- Go to Settings › Accounts, tap + and accept the warning.
- Enter the Username, Password and Domain (including the port) manually.
- In your iPhone settings for Zoiper, allow notifications, background app refresh and mobile data.
- In Zoiper, go to Settings › Incoming calls to turn on push notifications. This may need Zoiper Premium.
Check it works
Section titled “Check it works”- In PBX › Devices, the SIP device’s status changes from Offline to Online.
- Make a test call and ask someone to call you, to check your headset and that calls ring.
If it stays offline, check the details and see Softphone errors. A device that tries to register with a wrong password is blocked, and the block lifts after 5 minutes. Fix the details, wait, then try again.
Load your PBX phonebook into Zoiper
Section titled “Load your PBX phonebook into Zoiper”This needs a Zoiper Premium licence and the latest version of Zoiper.
- In the PBX, open Phonebooks and choose the phonebook. Click URLs, then XML Zoiper URL, and copy the link that opens. See Phonebooks.
- In Zoiper, open Settings › Contacts.
- Click Add, choose XML from the list, then click the smaller Add button.
- Paste the link into the local/URL path field and leave the authentication type as Don’t use.
- Click XML Contact Service 1 on the left to save.
The contacts appear in the Contacts tab on the Zoiper home screen.
Chat between Zoiper users
Section titled “Chat between Zoiper users”Zoiper’s chat needs Zoiper Premium, and only works between Zoiper users on your PBX.
- In Settings, select the account, click Advanced and, under features, turn on subscribe and publish presence. Save.
- Add each colleague as a Zoiper contact (calling their internal number is the quickest way), and choose your account for presence.
- Open the contact to see their status and send a message. Each colleague must turn on presence too.