Connect 3CX with a SIP trunk
Register your 3CX phone system to the PBX with a SIP trunk so it can make and receive calls.
This guide connects a 3CX phone system to your PBX with a SIP trunk. 3CX signs in to the PBX with a username and password, then makes and receives calls through your phone numbers.
Before you start
Section titled “Before you start”- Order a trunk licence and channels: go to Services › SIP trunking, set the number of Channels (one per simultaneous call), click Add licence, tick Agree to service terms and conditions and click Submit order.
- Have admin access to your 3CX system.
1. Create the SIP trunk in the PBX
Section titled “1. Create the SIP trunk in the PBX”- Go to the PBX tab. Drag SIP trunk from the Accept, make and divert calls group onto the canvas and click the gear icon.
- Enter a Name and set the Number of channels.
- For Mode, choose SIP registration.
- Choose a SIP trunk call plan. Without one, outgoing calls won’t work.
- Choose the Caller ID for outgoing calls, or Keep originator’s caller ID to use the number 3CX sends.
- Click Save.
- Connect an Inbound number with the numbers that should ring on 3CX to the SIP trunk.
- Click Apply configuration.
Open the trunk’s settings again and note the SIP credentials: Domain, Username and Password. The Domain is shown as server and port, separated by a colon. Also note the Transport protocol: TCP, or TLS if TLS encryption is turned on in Settings › General. See SIP trunk for every setting.
2. Add a 3CX system
Section titled “2. Add a 3CX system”Skip this if your 3CX system is already running.
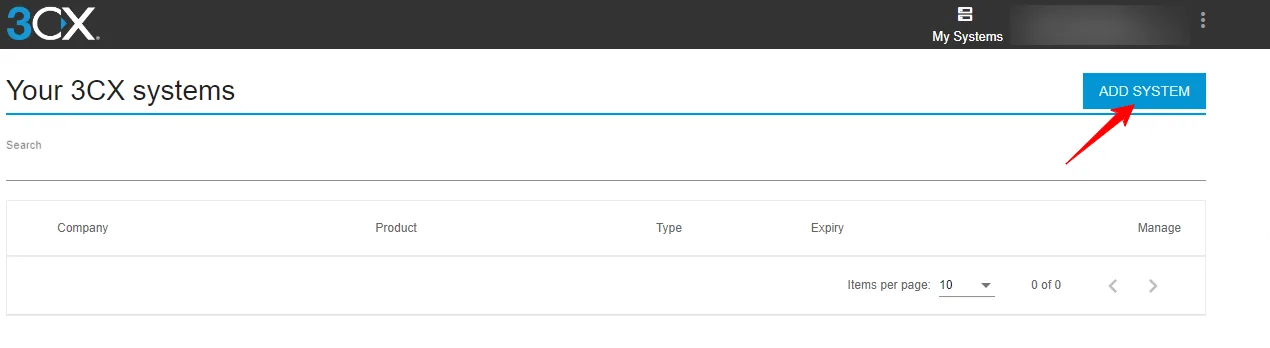
- Sign in to your 3CX account and click Add System.
- Choose a plan and click Next, then follow the setup. The options depend on the 3CX product you choose.
3. Add the trunk in 3CX
Section titled “3. Add the trunk in 3CX”-
When installation finishes, sign in to the 3CX Admin Console.
-
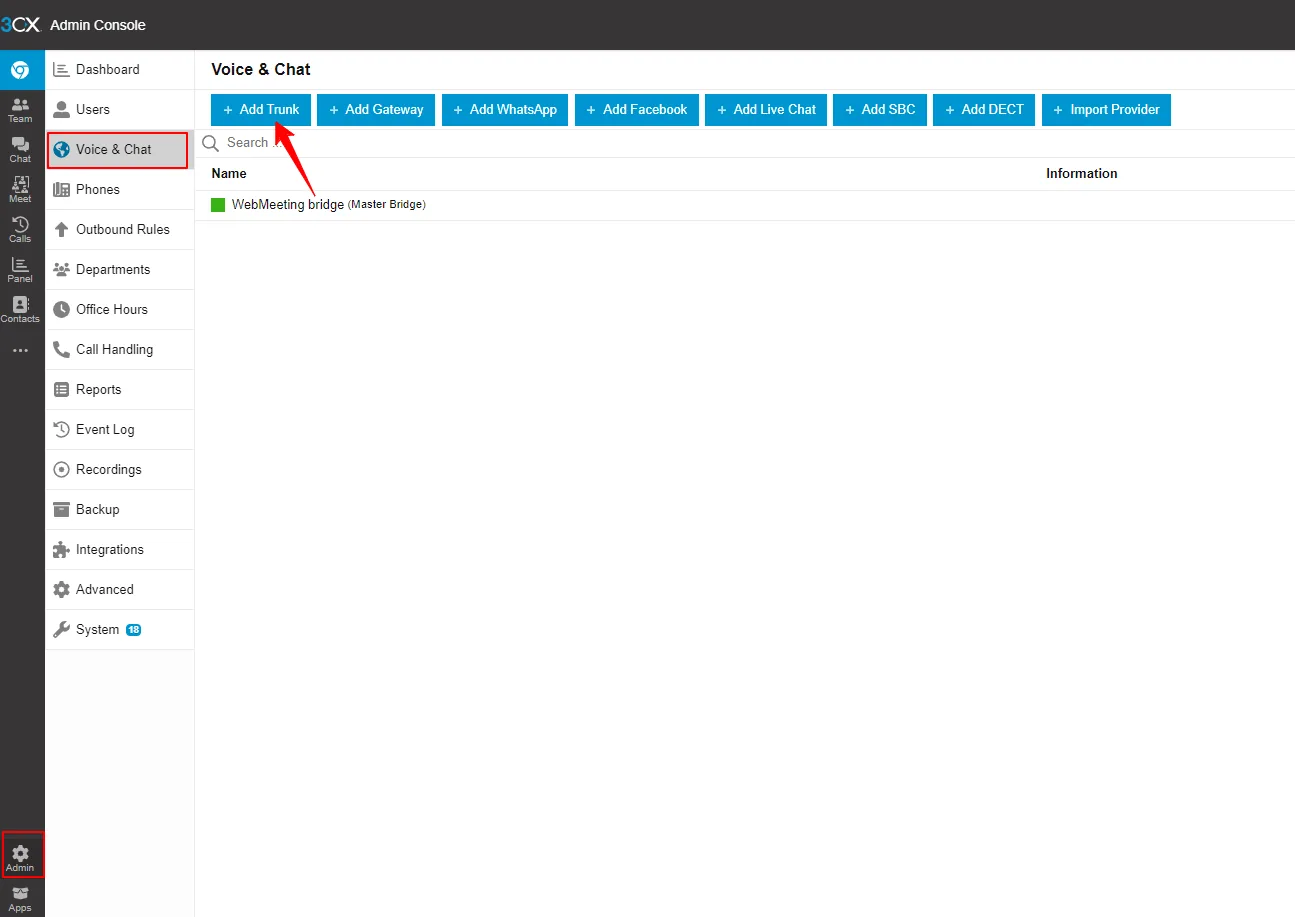
Go to Admin › Voice & Chat and click Add Trunk.
-
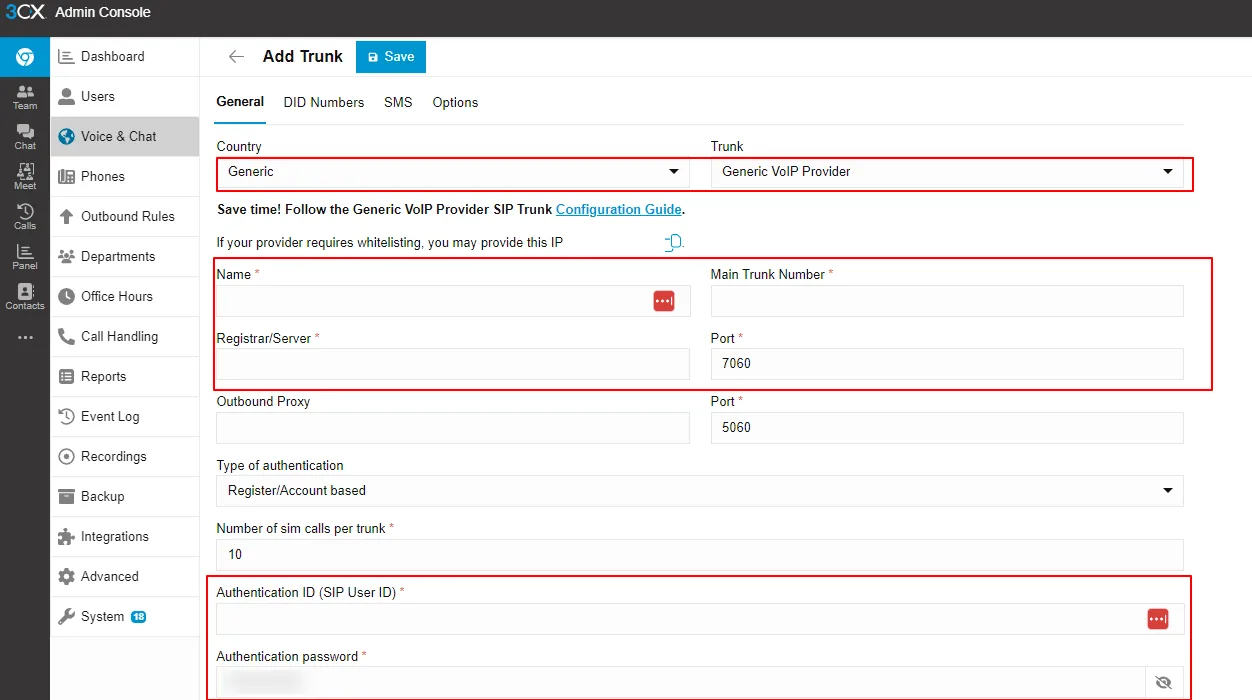
For Country, choose Generic. For Trunk, choose Generic VoIP Provider.
-
Fill in the fields from the PBX trunk’s SIP credentials:
3CX field Enter Name Any name for the trunk. Main Trunk Number Your main phone number. Registrar/Server The Domain, without the colon and port. Port (next to Registrar/Server) The port after the colon in the Domain. Authentication ID (SIP User ID) The Username. Authentication password The Password. -
Check the details and click Save.
If your 3CX version has a transport setting for the trunk, set it to match the trunk’s Transport protocol in the PBX (TCP, or TLS).
4. Add inbound and outbound rules in 3CX
Section titled “4. Add inbound and outbound rules in 3CX”- Add an inbound rule for each phone number you send to the trunk, so incoming calls reach the right 3CX extension or queue.
- Add an outbound rule that sends calls out through the new trunk.
Check it works
Section titled “Check it works”-
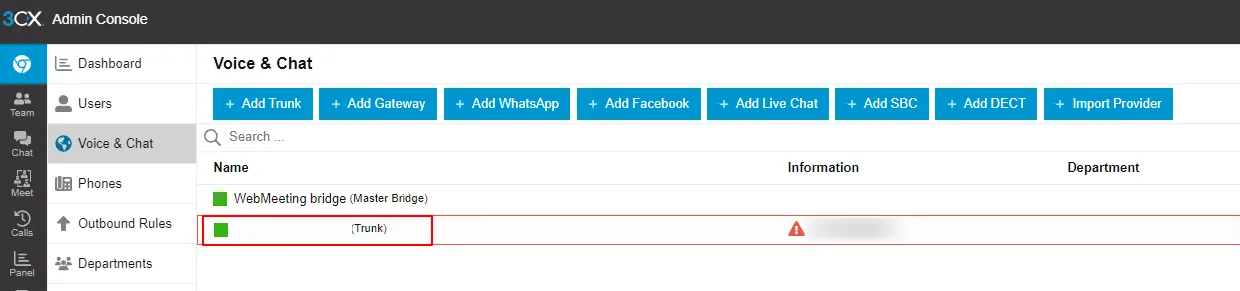
In 3CX, the trunk’s status turns green under Voice & Chat. In the PBX, the SIP trunk’s Status shows Online.
-
Call one of your numbers from a mobile. A 3CX extension should ring.
-
Call a mobile from a 3CX extension. The mobile should show your caller ID.
If calls fail, check the inbound and outbound rules in 3CX first. If the trunk stays offline, check the username and password: after failed sign-in attempts, the PBX blocks the IP address for 5 minutes. You can check this with Check IP address for blocking in the trunk’s settings.
Next steps
Section titled “Next steps”- SIP trunk: inbound and outbound rules for numbers and extensions hosted on 3CX.
- Device offline if the trunk won’t register.