Set up the Webphone
Give a user access to the Webphone by adding their email and a Webphone device in the PBX.
This guide is for PBX administrators. You give a person the Webphone by adding their email and a Webphone device to their User. Once you apply the configuration, they get an email to set their password.
Before you start
Section titled “Before you start”- The person needs a user licence, and one device licence for each Webphone version they’ll use. Order them in Services › PBX licences.
- Decide which versions they need. Each version is a separate device, and a user can only sign in to the versions you add:
| Device | Where it works |
|---|---|
| Webphone browser | In a web browser. Only one per user. |
| Webphone desktop | The desktop app for Windows, macOS or Linux. |
| Webphone mobile | The app for iOS or Android. Always shows as online. |
1. Add the email
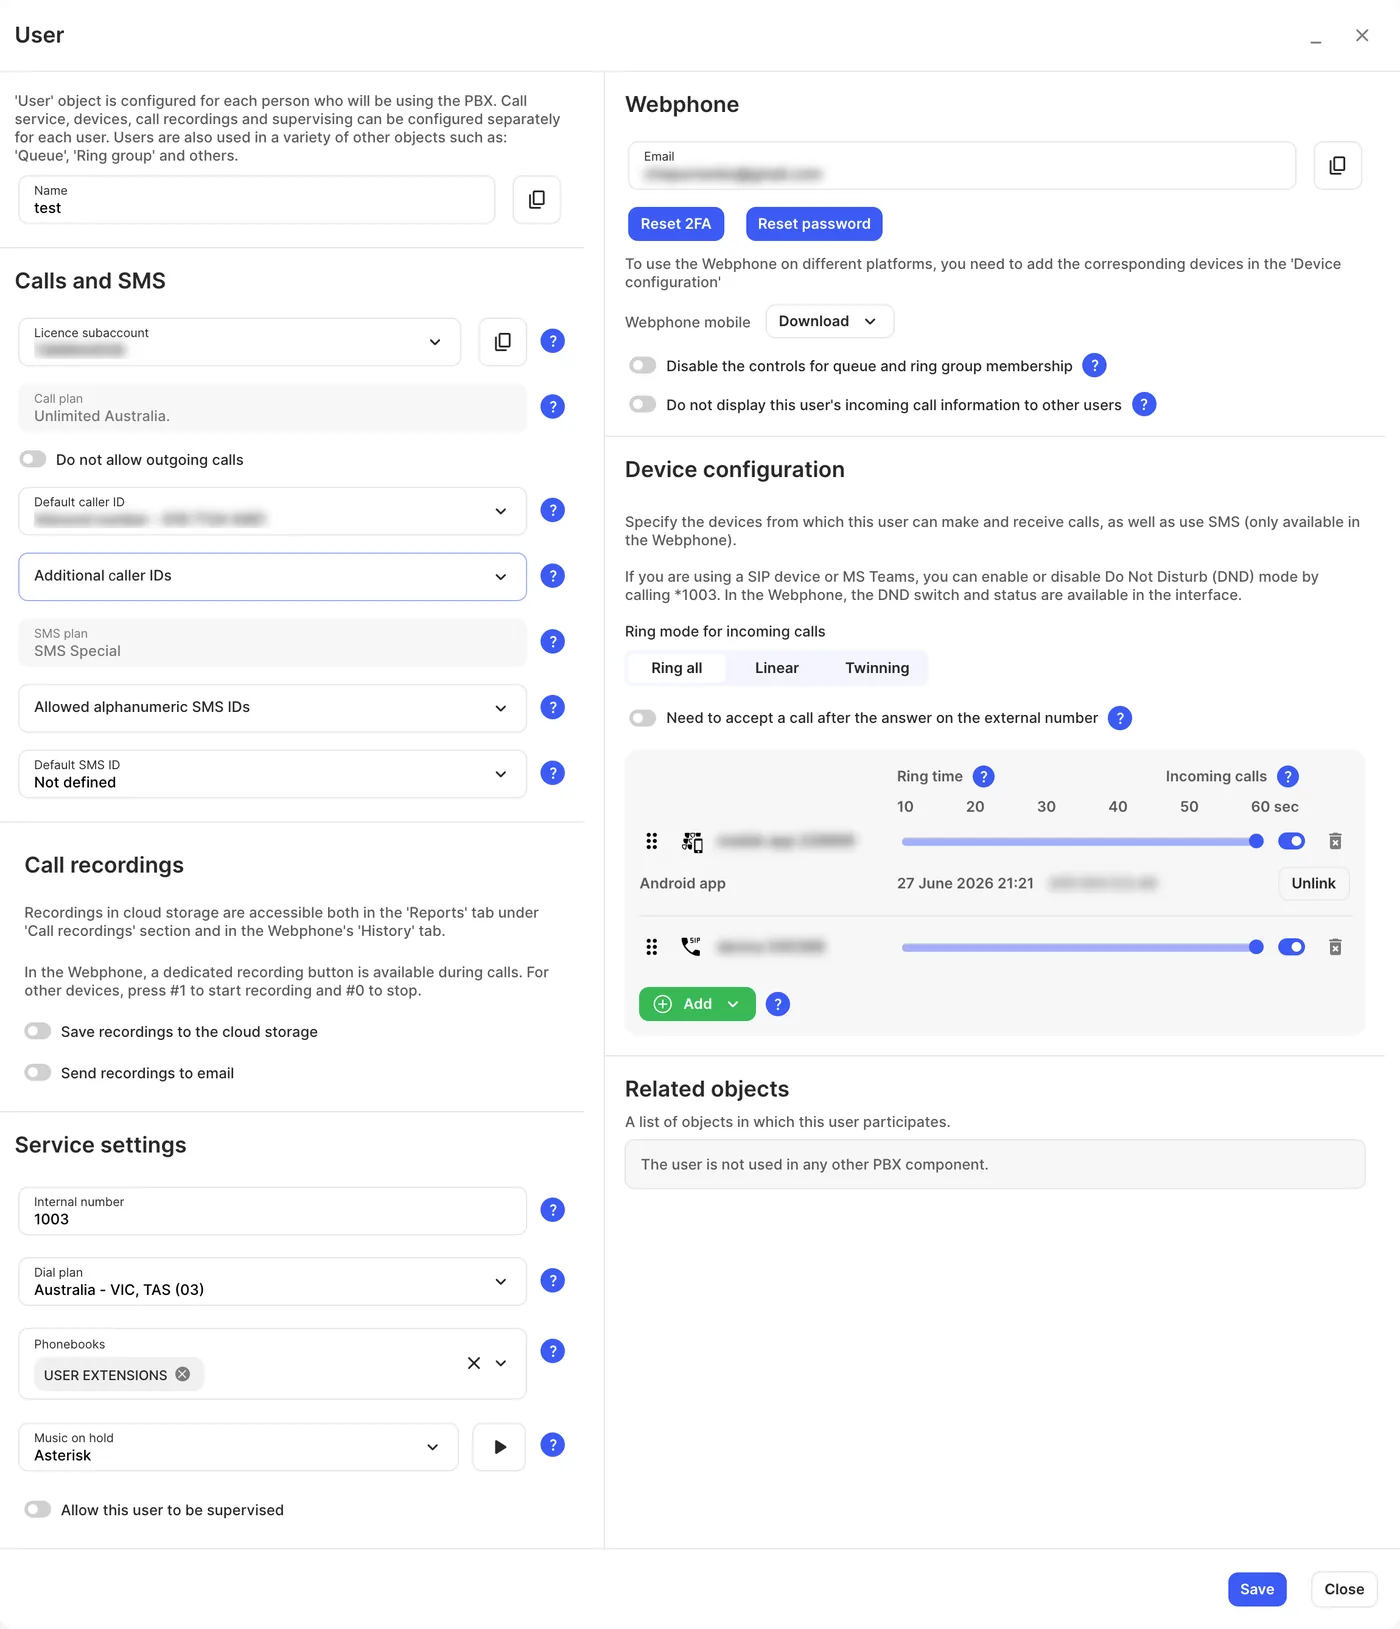
Section titled “1. Add the email”- On the PBX tab, drag User onto the canvas, or find the existing user, and click the gear icon.
- Under Webphone, enter the person’s Email. This is their Webphone sign-in.
2. Add a Webphone device
Section titled “2. Add a Webphone device”- Under Device configuration, click Add and choose Webphone browser, Webphone desktop or Webphone mobile.
- In the window that opens, select an unused Webphone device from the list and click Add. If there are no free devices, click Create a new Webphone, then click Add.
- Repeat for each version the person needs.
- Click Save.
If you see There are not enough device licences., every device licence is in use. Order more in Services › PBX licences (the warning may offer Order device licences), or free one up by deleting a device you no longer need.
3. Apply the configuration
Section titled “3. Apply the configuration”Click Apply configuration. The PBX then emails the person an invitation to set their Webphone password.
Check it works
Section titled “Check it works”- Ask the person to open the invitation and set a password. See Sign in to the Webphone for the first time.
- Open Devices at the top of the PBX tab. Once they’ve signed in, the Webphone browser or desktop device shows Online.
Change or swap a Webphone device
Section titled “Change or swap a Webphone device”A Webphone desktop or Webphone mobile device is linked to the computer or phone the person first signs in on. If the person moves to a new computer or phone, or you added the wrong version:
-
To let them sign in somewhere new: find the device in the user’s Device configuration and click Unlink next to it, then Unlink to confirm. Click Save and Apply configuration. The device is then free for the person’s next sign-in. Unlink appears only for desktop and mobile devices that have been used.
-
To change the version: add a device of the right type as in step 2. Then click the delete icon next to the wrong device and choose:
- Delete to remove it completely and free its licence;
- Unbind to keep it, so you can give it to another user later.
Then click Save and Apply configuration. All devices are listed under Devices at the top of the PBX tab.
Help a user who is locked out
Section titled “Help a user who is locked out”Under Webphone in the user’s settings:
- Reset password emails them a link to set a new Webphone password. The section then shows when the email was sent. It appears once the person has activated their Webphone account.
- Reset 2FA clears their authenticator app setup. It appears once they’ve set up 2FA. See Reset Webphone two-factor authentication.
The person can also click Forgot your password? on the Webphone sign-in page.