Webphone notifications and ringtone
Turn on incoming call notifications and the ring sound for the Webphone in your browser and computer settings.
The Webphone needs two permissions to tell you about a call: notifications, for the pop-up, and sound, for the ring. Browsers and computers sometimes block them. This guide shows where to allow them.
Before you start
Section titled “Before you start”Open the Webphone in the browser you use for calls, so you can find its site in the browser settings.
1. Turn on notifications in the Webphone
Section titled “1. Turn on notifications in the Webphone”- In the Webphone, go to Settings › Notifications.
- Turn on Incoming calls. You can also turn on Missed calls, SMS, Voicemail and Call parking.
The switches save straight away. Turn on Automatically hide notifications after 60 seconds if you want pop-ups to close by themselves.
If you see Notifications are blocked, allow them in your browser (step 3).
2. Allow notifications on your computer
Section titled “2. Allow notifications on your computer”Your computer must also allow notifications from your browser or the desktop app.
- Windows: Settings › System › Notifications, then turn on your browser or the Webphone app.
- macOS: System Preferences (System Settings on newer versions) › Notifications, choose your browser or the Webphone app, and turn on Allow notifications.
Also check that Focus or Do Not Disturb isn’t on, as it hides notifications.
3. Allow notifications in your browser
Section titled “3. Allow notifications in your browser”Google Chrome
- Click the padlock (or site information icon) at the start of the address bar.
- Set Notifications to Allow.
- Also check
chrome://settings/content/notificationsto make sure notifications aren’t blocked for every site.
Microsoft Edge
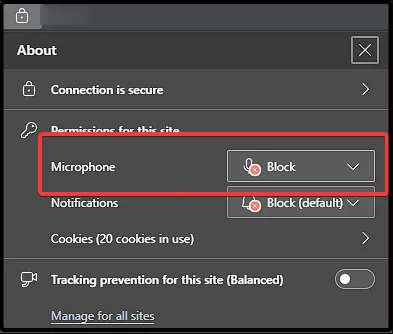
- Click the padlock in the address bar, then Permissions for this site.
- Set Notifications to Allow. Check Microphone is allowed too.
Mozilla Firefox
- Click the padlock in the address bar, then More information.
- On Permissions, set Send notifications to Allow.
Safari
- Go to Safari › Preferences (Settings on newer versions) › Websites › Notifications.
- Find the Webphone and set it to Allow.
4. Turn on the ring sound
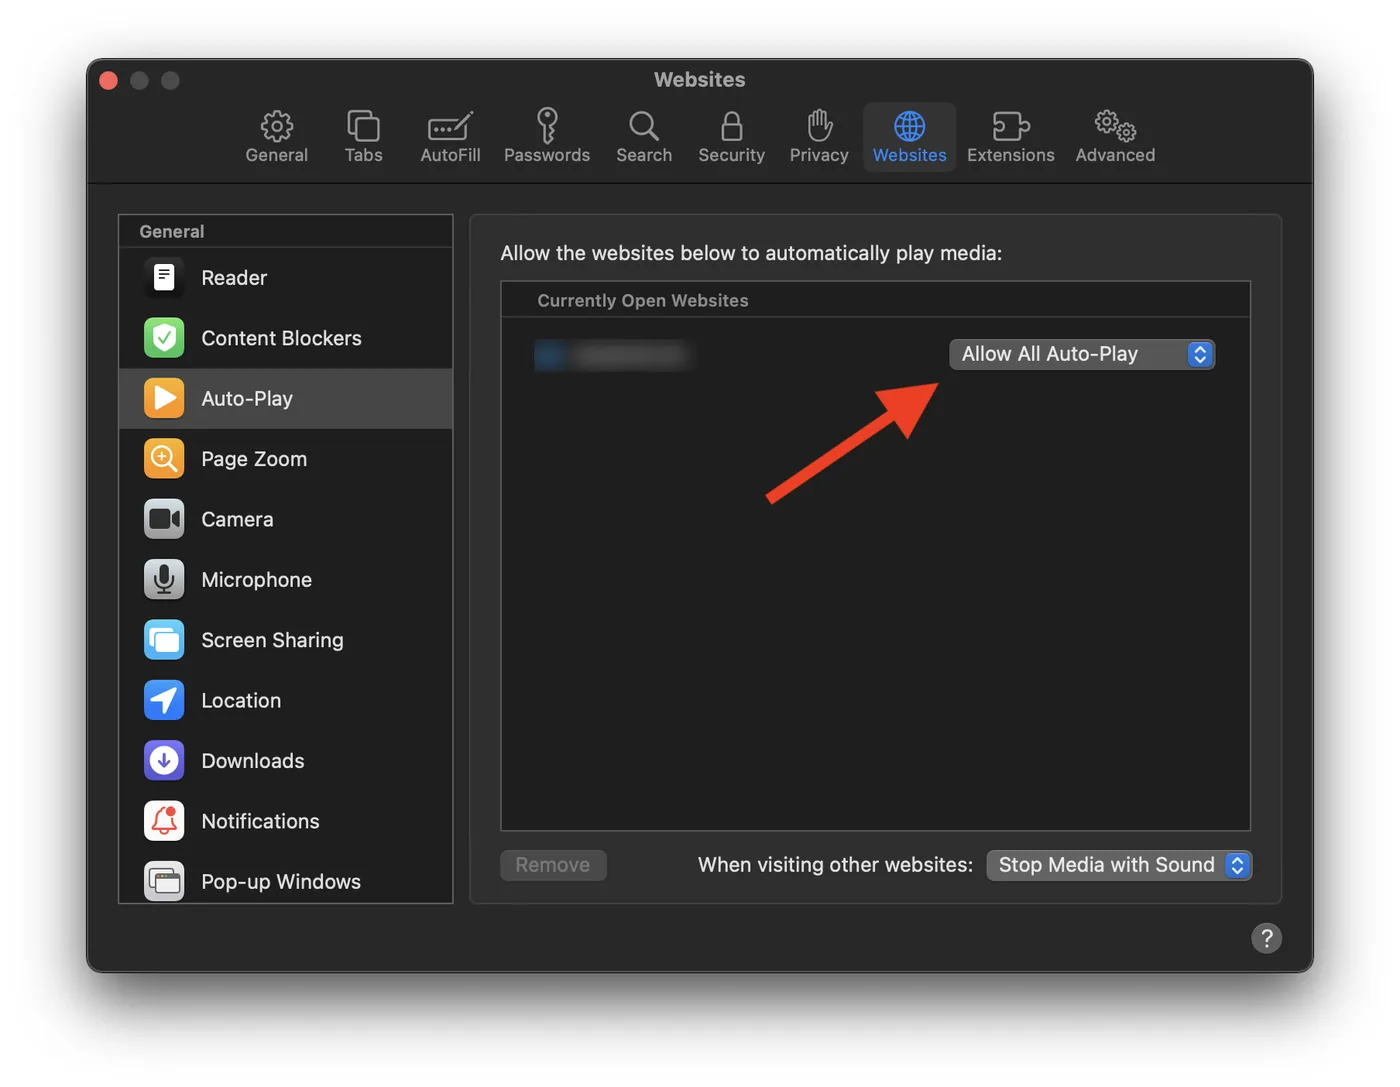
Section titled “4. Turn on the ring sound”Safari blocks sounds that play by themselves, so the Webphone can’t ring until you allow it:
- Keep the Webphone open, and go to Safari › Preferences (Settings) › Websites › Auto-Play.
- Find the Webphone under Currently Open Websites and choose Allow All Auto-Play.
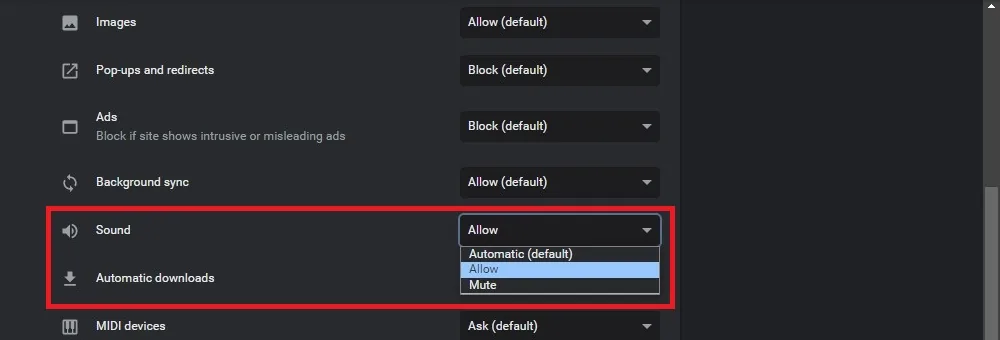
Chrome and Edge: open the site settings from the icon next to the address bar and set Sound to Allow.
Choose a ringtone
Section titled “Choose a ringtone”- In the Webphone, go to Settings › Ringtones.
- Choose your Default ringtone.
- Click Save changes.
Your administrator can tag some calls with Alert info in a Caller ID prefix object, for example calls from a particular queue. To give those calls their own ringtone, click Add on the Ringtones page, choose the Alert info and a Ringtone, and click Save changes.
Check it works
Section titled “Check it works”Ask a colleague to call you while the Webphone is in the background. You should see a notification and hear it ring.
If it still doesn’t ring, see Webphone troubleshooting and Phone not ringing.