Set up your phone system
Go from a new account to your first working call in seven steps.
This guide takes you from a new account to a working phone number that rings your team. It takes about 15 minutes. You’ll get a phone number, add a person and their phone, connect them in the PBX, and make a test call.
Before you start
Section titled “Before you start”- Sign in to the customer portal with the email and password from your welcome email.
- Have your payment method ready. New accounts are prepaid, so orders are paid from your account balance.
- New account on a free trial? Verify your identity first: until you do, you can only make calls inside your own phone system. Trial calls end after 1 minute. Once you’re verified, you can activate your account at any time to remove the trial limits. See Your free trial.
1. Find your way around the portal
Section titled “1. Find your way around the portal”The portal has six tabs along the top. You’ll mostly use Services to order things and PBX to decide where calls go.
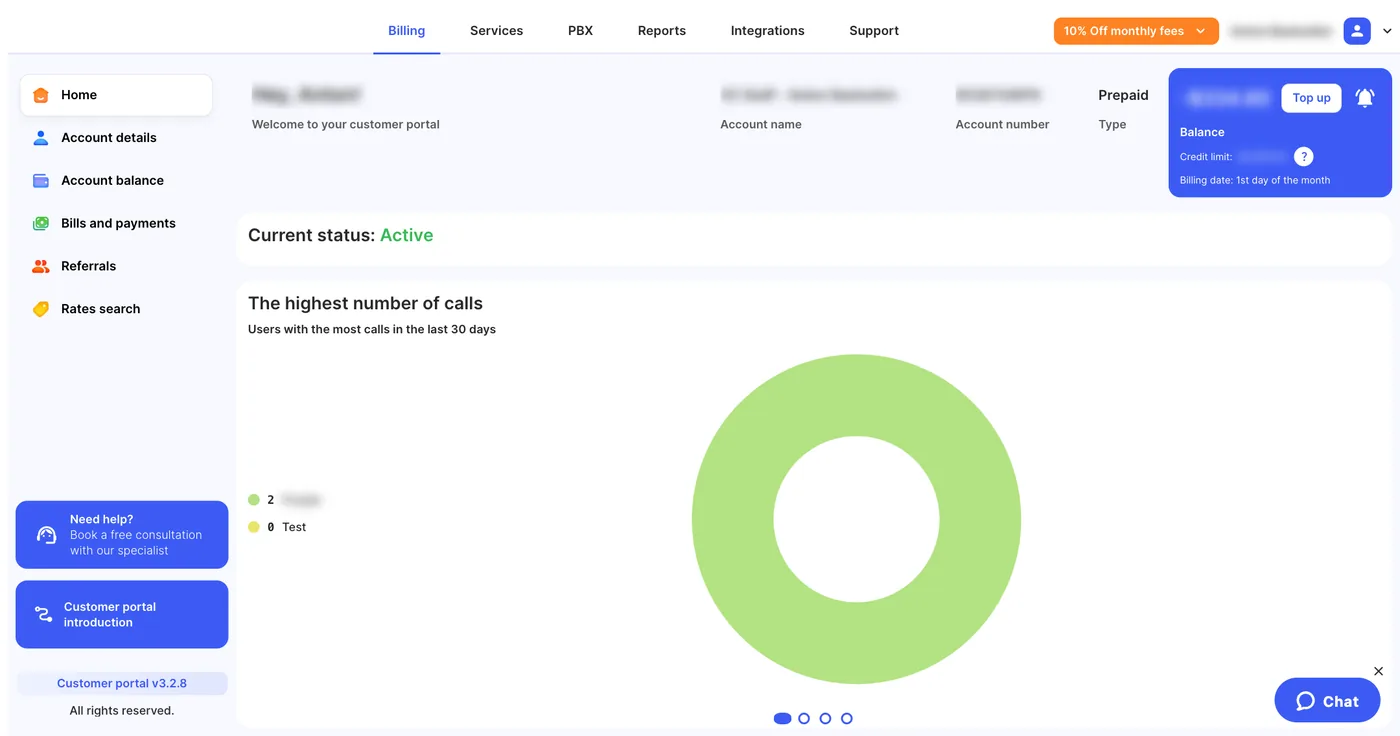
| Tab | What you do there |
|---|---|
| Billing | See your balance, top up, pay invoices, manage administrators. |
| Services | Order phone numbers, licences, SIP trunks, call recording storage, phones and more. |
| PBX | Build your call flow: where calls go, when, and who answers. |
| Reports | Call history, recordings and statistics. |
| Integrations | Connect CRMs, Zapier, the API and webhooks. |
| Support | Network status, support tickets, this knowledge base, feature suggestions. |
2. Get a phone number
Section titled “2. Get a phone number”- Go to Services › Phone numbers.
- Choose the Country and Area, then pick a number from the list.
- Tick Agree to service terms and conditions and click Submit order.
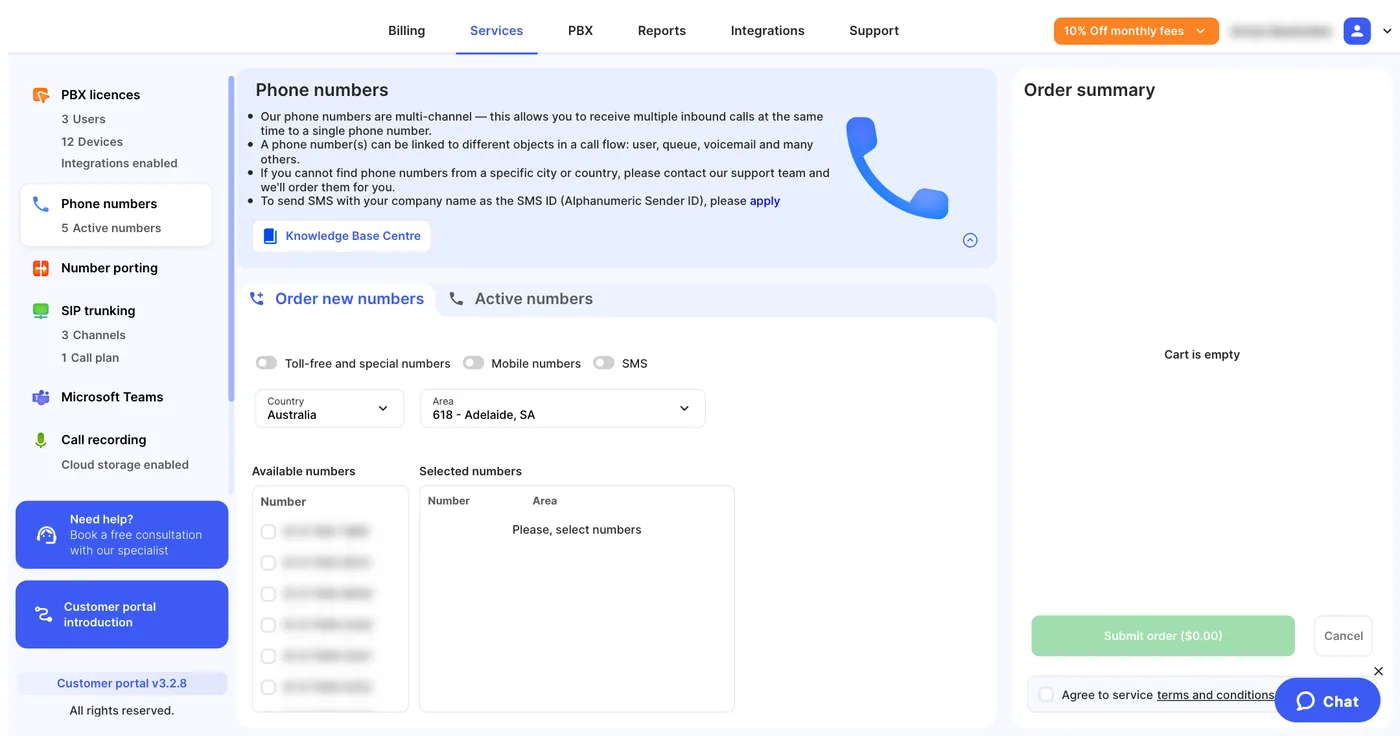
During the free trial you can only order local (geographic) numbers. To keep the number you already have, port it in Services › Number porting once your account is active. See Your free trial.
3. Order licences for your people and phones
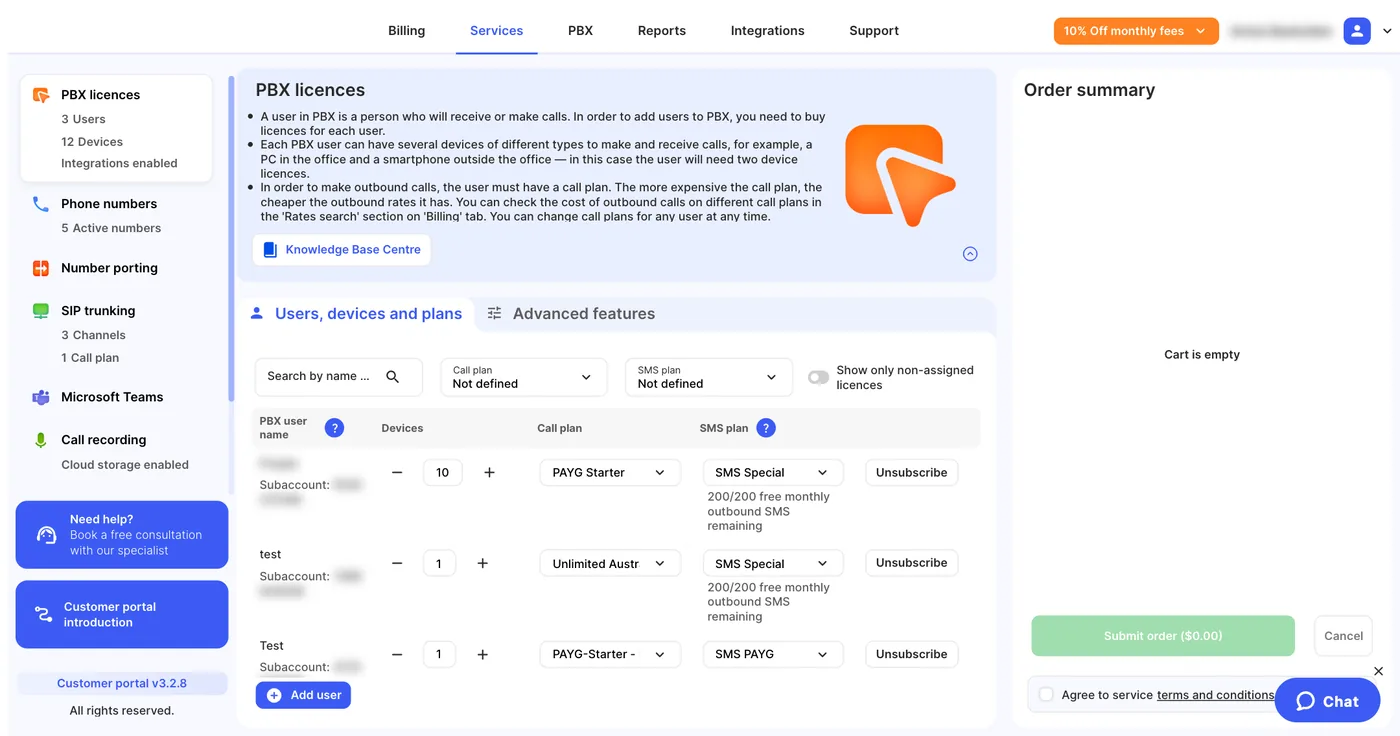
Section titled “3. Order licences for your people and phones”Every person who makes or receives calls needs a user licence, and every phone or app they use needs a device licence.
- Go to Services › PBX licences.
- Click Add user for each person, and set how many devices each user needs. Someone with an office phone and a mobile app needs two device licences.
- Tick Agree to service terms and conditions and click Submit order.
4. Add the number to your call flow
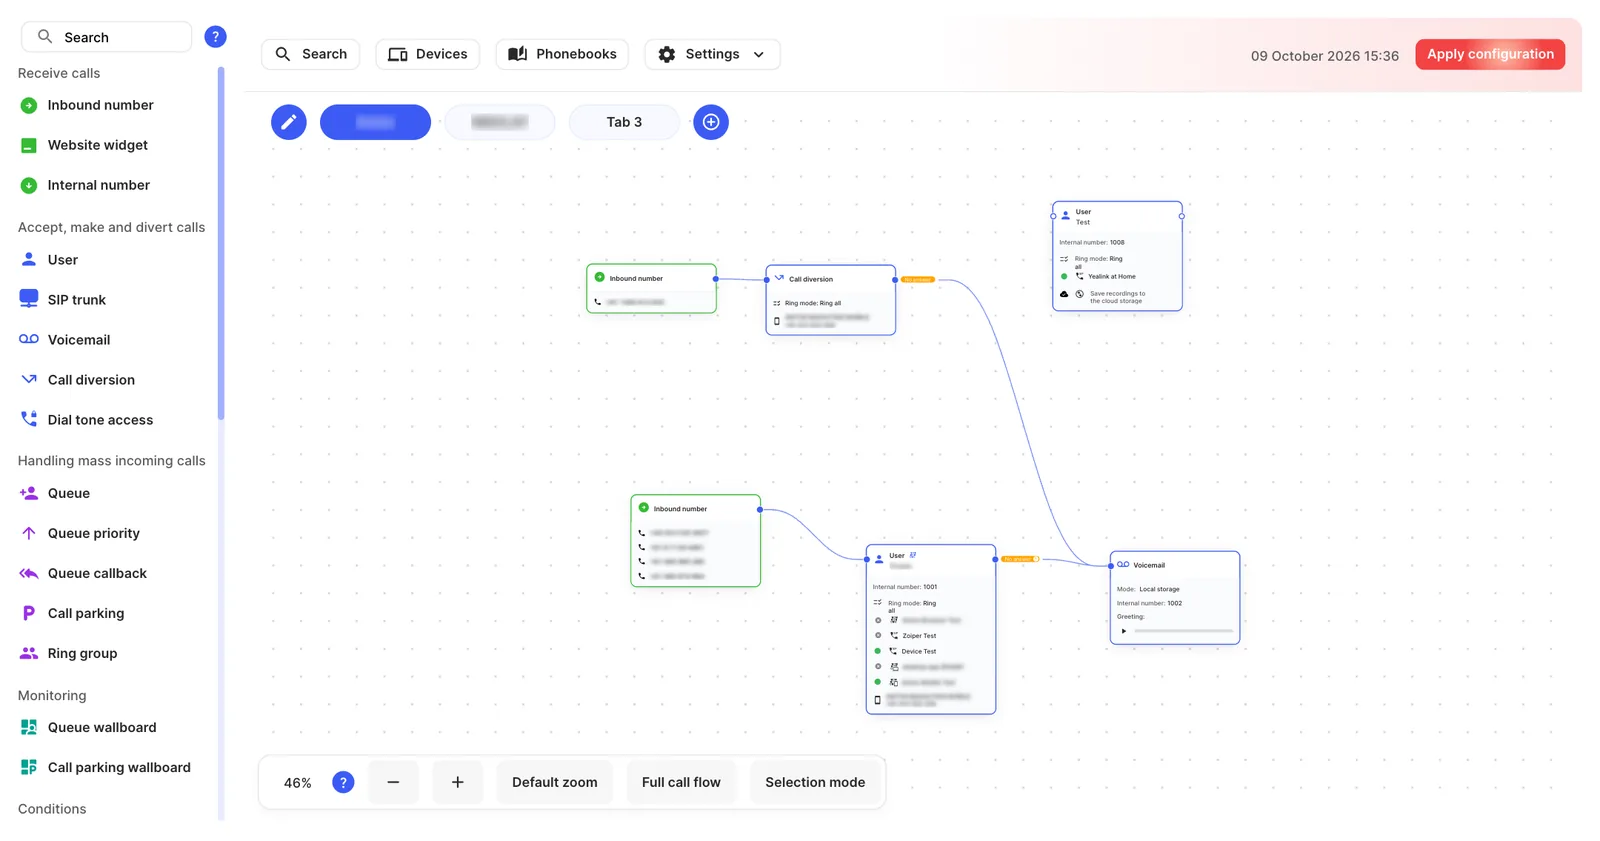
Section titled “4. Add the number to your call flow”- Go to the PBX tab.
- Drag Inbound number from the palette on the left onto the canvas.
- Click the gear icon, enter a name such as “Main line”, move your new number from Available numbers to Included numbers, and click Save.
See Inbound number for details.
5. Add a user and their phone
Section titled “5. Add a user and their phone”- Drag User onto the canvas and click the gear icon.
- Enter the person’s Name, choose their Licence subaccount, and choose your new number as their Default caller ID.
- Enter their Email under Webphone, so they can sign in to the Webphone.
- Under Device configuration, click Add and choose a device: Webphone browser, Webphone desktop, Webphone mobile, or SIP device for a desk phone.
- Click Save.
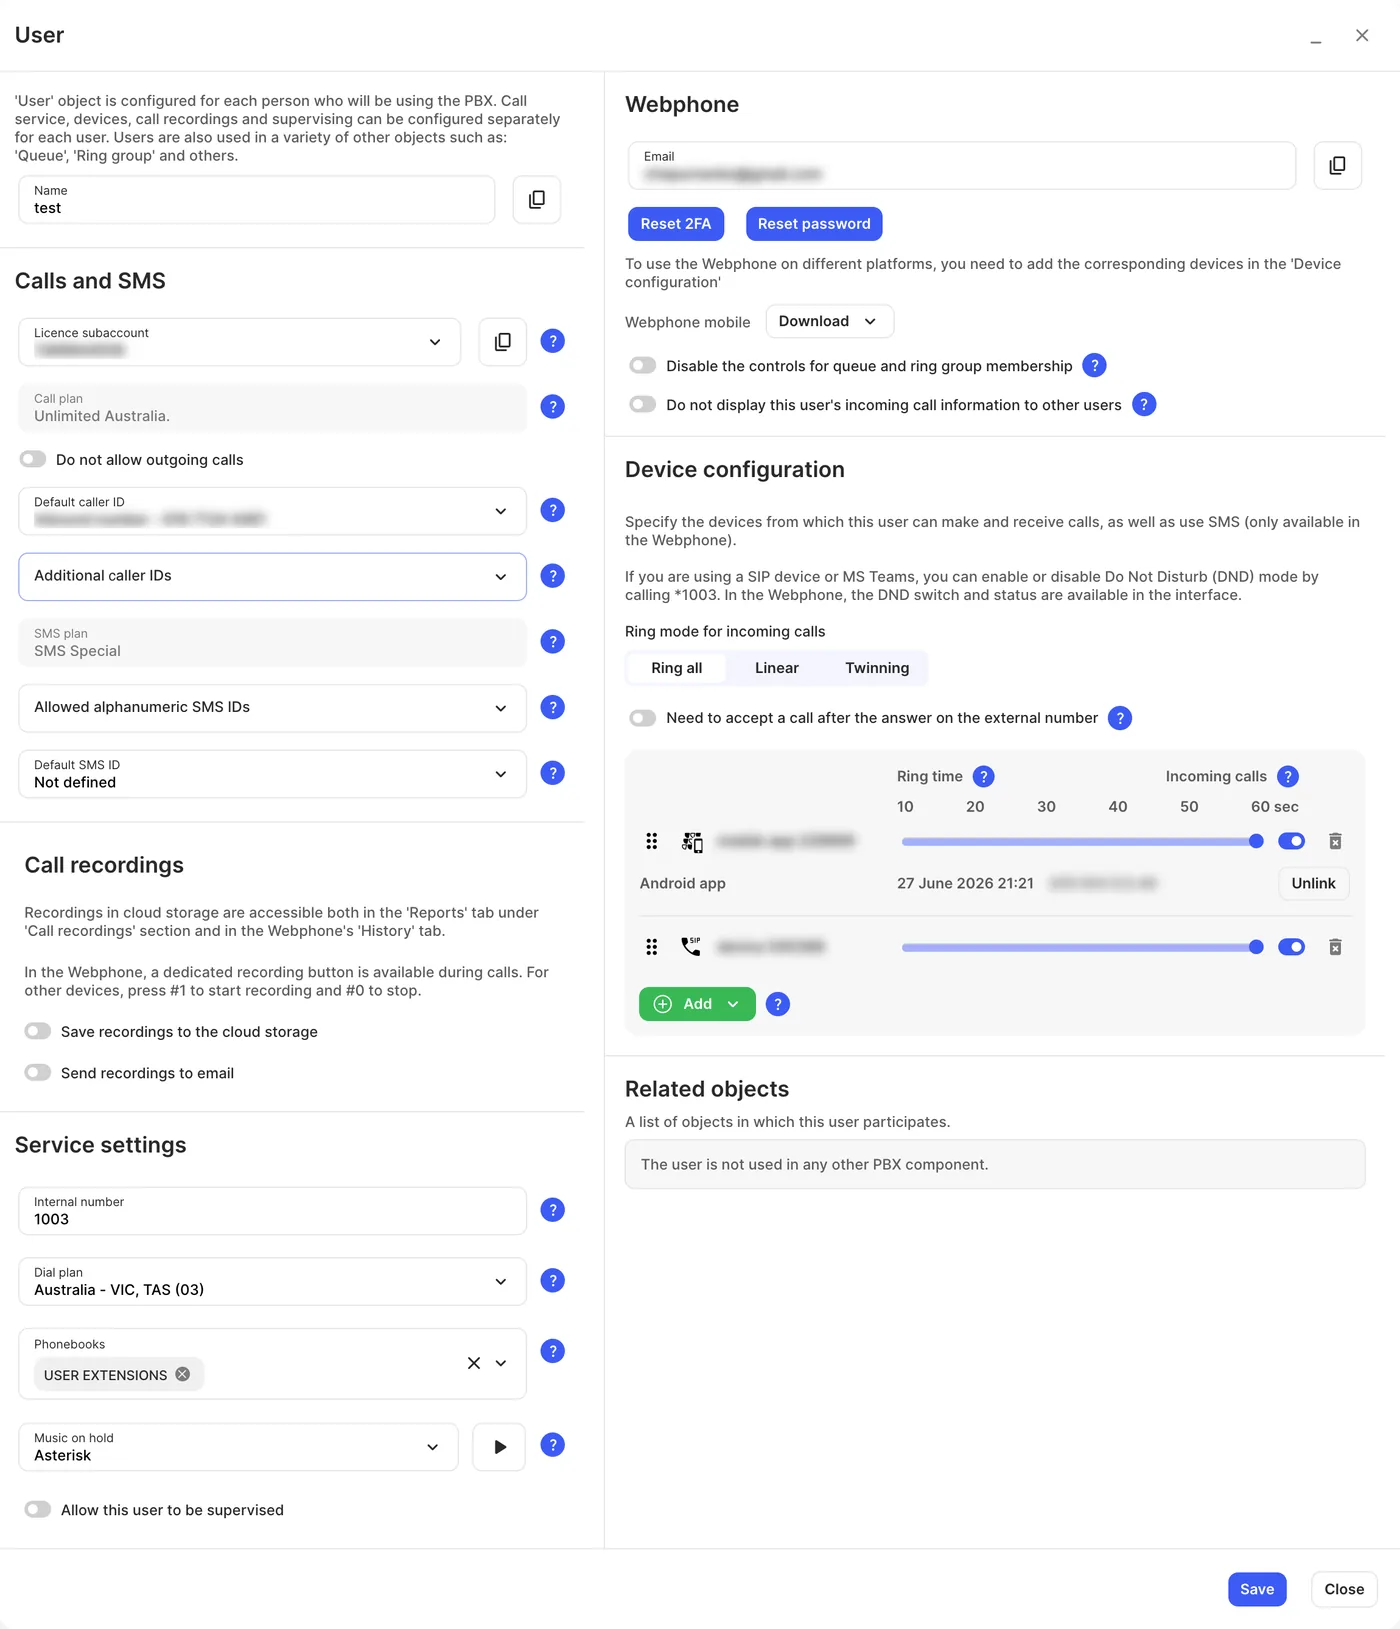
See User for every setting.
6. Connect them and apply
Section titled “6. Connect them and apply”- Drag from the connection point on the right of the Inbound number to the left of the User.
- Click Apply configuration in the top-right corner.
7. Make a test call
Section titled “7. Make a test call”- Sign in to the Webphone: the user gets a password email once the configuration is applied. For a desk phone, use its SIP details from PBX › Devices.
- Call your new number from a mobile. The user’s device should ring.
- Answer, then call a mobile from the Webphone or desk phone. The mobile should show your new number.
If the call doesn’t ring, check that you clicked Apply configuration. For a browser, desktop or SIP device, check that it shows Online in Devices. Webphone mobile always shows as online.
Next steps
Section titled “Next steps”- Send missed calls to Voicemail by connecting the User’s No answer path.
- Route calls by business hours with Time conditions.
- Add a “Press 1 for sales” menu with a Voice menu.
- Share calls across a team with a Ring group or Queue.