Number porting overview
Move your existing phone numbers from your current provider, and track the port in the portal.
Number porting moves a phone number you already have from your current provider (the losing provider) to your account here. You fill in an application in the portal, attach a recent invoice from your current provider, and the porting team takes it from there.
Porting follows strict industry codes. Every detail on the application must match your current provider’s records exactly. One wrong detail can get the port rejected, and the process then starts again.
Types of port
Section titled “Types of port”| Number type | Port type | Typical time | More |
|---|---|---|---|
| A single landline number with no extra services | CAT A (simple) | 2–10 business days after the losing provider accepts it; up to 15. | CAT A and CAT C porting |
| Numbers with ISDN, line hunt, fax or ADSL, number blocks, or several linked numbers | CAT C (complex) | 5–28 business days after the losing carrier accepts the port. | CAT A and CAT C porting |
| Mobile numbers | Mobile port | Needs an SMS verification from you. | Mobile number porting |
| 1300 and 1800 numbers | Inbound number port | — | Porting FAQs |
| Smart numbers bought from ACMA | Inbound number port | — | Smart numbers |
The cost, fees and expected porting time for each type are shown in the application form.
Before you start
Section titled “Before you start”- Get a recent invoice from your current provider. It must show the account name, account number, service address and the numbers you’re porting. The portal asks for an invoice from the last 6 months; for postpaid mobile numbers, use your most recent invoice. Prepaid mobile numbers need a recent top-up invoice plus other proof of ownership: see Mobile number porting.
- Call your current provider and confirm the account details, whether the port is CAT A or CAT C, and every number linked to the account. See Minimise the risk of rejection.
- Keep the old service active. Don’t cancel it or change it before or during the port, or the port may be rejected.
- Top up your balance. The porting fee is charged after the porting team reviews your application, so have enough balance ready in advance.
Submit a porting application
Section titled “Submit a porting application”- Go to Services › Number porting and click New porting.
- Choose the Country of the phone number(s) and the Type of the number(s).
- Optional: enter your own External reference for the port.
- Under Upload the most recent invoice from a previous service provider, upload the invoice.
- Complete the application form so it matches the invoice exactly. The form for your number type shows its cost, fees and porting time.
- Check every detail again, click Submit application and confirm.
Track your port
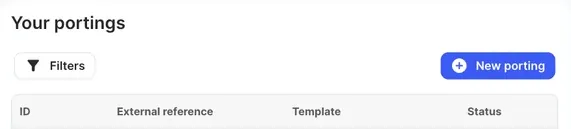
Section titled “Track your port”Your applications are listed under Your portings with their ID, External reference, Template and Status. Use Filters to find one.
- Click a porting to open its details and comments.
- Read the porting team’s updates in the comments. They post an update as the port moves through each stage.
- To ask for the latest status, or to answer a question from the porting team, write a comment and submit it.
Comments on the porting are the best way to contact the porting team.
A porting can have these statuses: Draft, New, Submitted, Resubmitted, Rejected, Booked, Completed and Cancelled. A new application has the status New. When it changes to Submitted, set up the numbers in your call flow so they work as soon as the port completes: see Prepare for porting cutover.
You can Edit a draft or a rejected porting, Delete a draft, and Cancel a porting that is New or Rejected. When you cancel, you’re asked for the reason. View PDF shows the application.