Set up a Yealink phone from the handset
Register a SIP account using the phone's own menu or touch screen, without a computer.
You can register a Yealink phone using its own keys or touch screen. This is handy when you don’t have a computer on the same network. The steps below use a T57W touch screen phone; menu names are similar on other models, but the keys you press differ.
Before you start
Section titled “Before you start”- A SIP device in PBX › Devices, added to a User, with the configuration applied.
- The device’s SIP details: select it in PBX › Devices and note the Domain, Username and Password under SIP credentials. The Domain is shown as
server:port. - The phone’s admin password. The default is
admin.
-
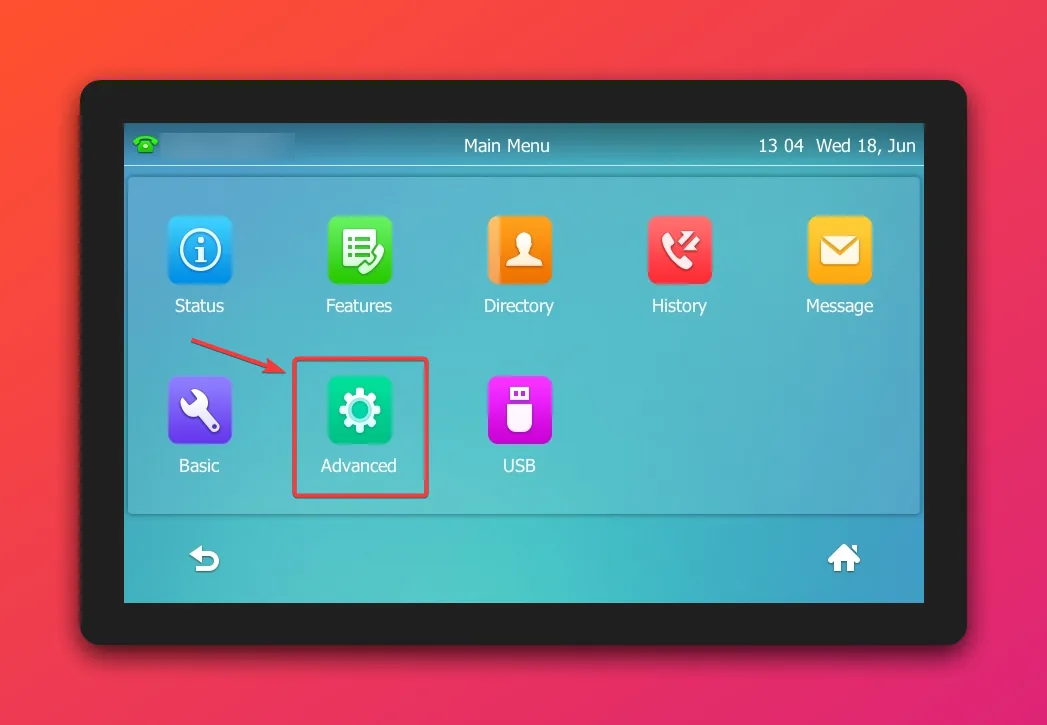
Press the Menu button (or tap Menu on the screen).
-
Tap Advanced.
-
Enter the admin password and confirm.
-
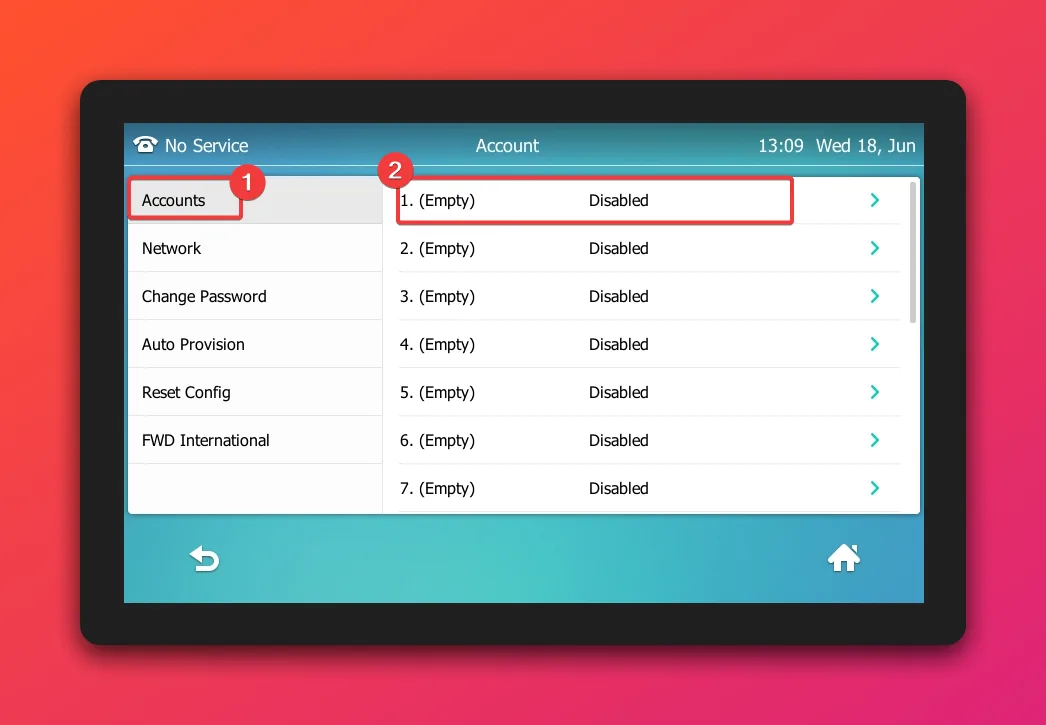
Tap Accounts, then the account to set up, for example 1. (Empty).
-
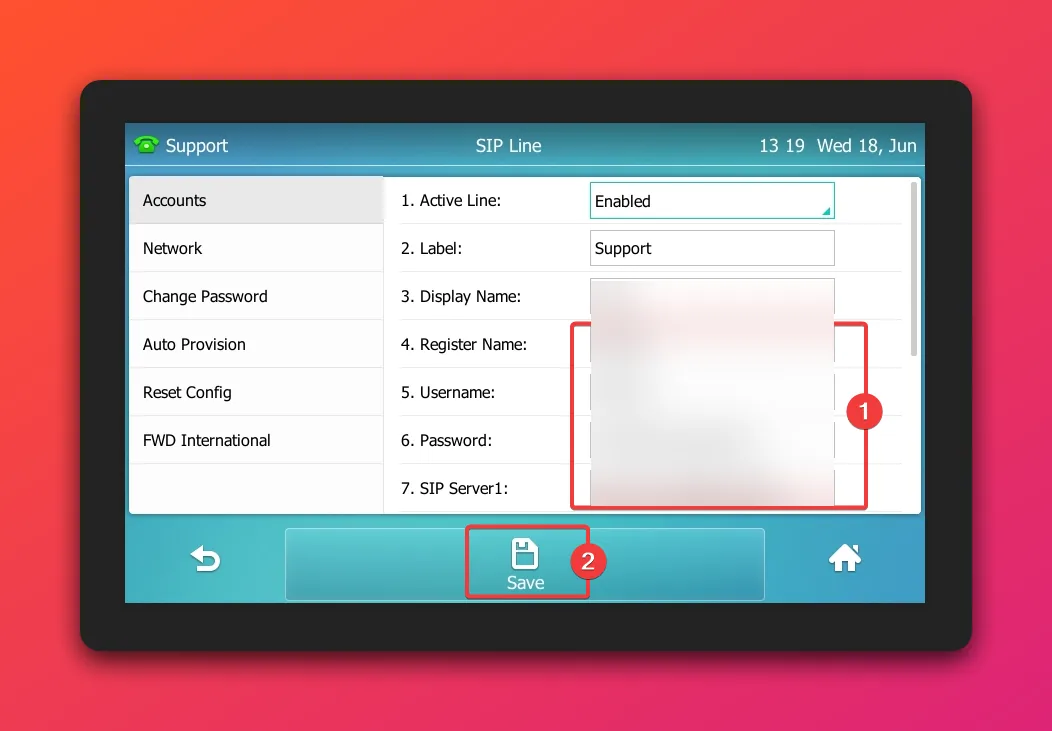
Fill in the account:
- Active Line: Enabled
- Label: the name to show on the phone’s screen
- Display Name: the person’s name
- Register Name and Username: the Username from the PBX
- Password: the Password from the PBX
- SIP Server1: the Domain from the PBX, the part before the colon
-
Scroll down and set the server port to the part of the Domain after the colon, and the transport to TCP.
-
Tap Save.
Check it works
Section titled “Check it works”- The label you entered appears at the top of the phone’s screen with a green phone icon.
- In PBX › Devices, the device shows Online.
- Call another user’s internal number.
If the device stays Offline, check each field and that the configuration was applied. A device that signs in with wrong details is blocked for 5 minutes, so wait before trying again. See Device offline.
Next steps
Section titled “Next steps”- Set up a Yealink desk phone manually (web interface, missed call light, firmware)
- Transfer calls on a Yealink phone