Webphone overview
Make and answer calls, send SMS, manage contacts and see your call history in the Webphone on your computer.
The Webphone is your provider’s own phone app. It works in a web browser, as a desktop app for Windows, Mac and Linux, and as a mobile app for iOS and Android. It’s linked to your PBX, so it shows your phonebooks, call history, SMS chats and queues, not just a dial pad.
This page covers the browser and desktop versions. For phones and tablets, see Webphone mobile app.
Before you start
Section titled “Before you start”Your PBX administrator sets you up first: they add your email and a Webphone device to your user. See Set up the Webphone. You then get an email to set your password: see Sign in to the Webphone for the first time.
Main parts
Section titled “Main parts”The dial pad is on the left, and the menu at the top takes you to each part. In a narrow window, the tabs are along the bottom instead, with Dialpad as the first tab.
| Tab | What you do there |
|---|---|
| Dialpad | Make calls and choose your caller ID. |
| Contacts | Search, add, edit and delete contacts in your phonebooks. |
| SMS | Send and reply to text messages. |
| History | See every call you made, received or missed, on any of your devices. |
| Services | Join or leave queues and ring groups, use call flow controls, and manage voicemail and call parking. |
| Settings | Your profile, password, language, notifications, ringtones and devices. |
Make a call
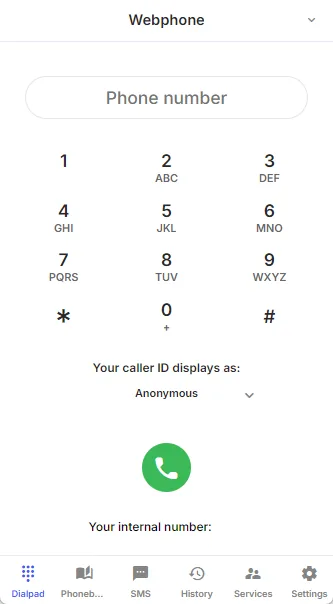
Section titled “Make a call”- Open Dialpad.
- Type the number with your keyboard, click the keys, or paste it into Phone number. You can also click a contact’s number in Contacts to call it straight away.
- Under Your caller ID displays as:, choose the number the other person sees. The list shows every caller ID your administrator allows you to use.
- Click the green call button.
If you see No access to the microphone, the Webphone can’t use your microphone. See Webphone troubleshooting.
Answer a call
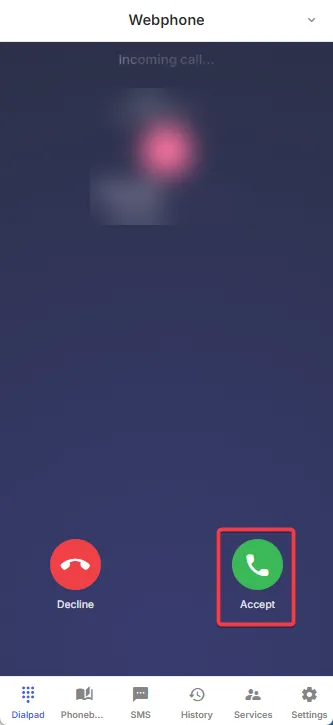
Section titled “Answer a call”Click Accept to answer or Decline to reject the call. The desktop app and browser can also show a pop-up notification for incoming calls.
The Webphone needs permission to use your microphone and show notifications. If it doesn’t ring, see Webphone notifications and ringtone.
Contacts
Section titled “Contacts”Contacts shows the phonebooks your administrator shares with you. Use the search field above the list to find a contact by name or number.
- Add a contact: click New contact, enter a Phone number and Name, and optionally an Email and picture. Click Create.
- Edit a contact: click the pencil icon next to it, change the details and click Update.
- Delete a contact: click the delete icon next to it, then click Delete.
Contacts in a read-only phonebook can only be changed by a PBX administrator. See Phonebooks.
Call history
Section titled “Call history”History lists calls to and from you, on all your devices, newest first. For each call it shows:
- the contact name, or the number if it isn’t in your phonebook;
- the type: inbound, outbound or missed;
- the line used: the number that was called, or the caller ID you used;
- the duration, and the date and time.
To save an unknown number, click the add-contact icon at the end of its row. Use Search and Filters to find a call. If your administrator stores your call recordings in the cloud, you can play them here too.
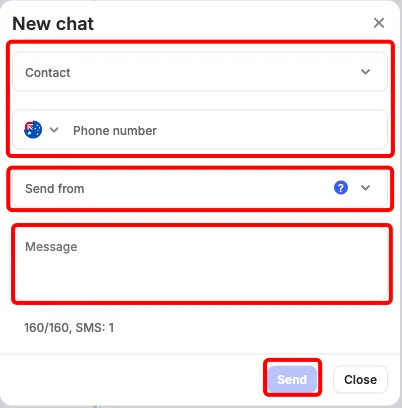
- Open SMS and click +.
- Choose a Contact or type a Phone number.
- In Send from, choose the number or sender ID to send from.
- Type your Message and click Send.
To reply, click the chat, type your message and click Send.
SMS needs an SMS plan and an SMS-enabled number routed to you. See SMS to Webphone users.
Queues and ring groups
Section titled “Queues and ring groups”In Services, use the switches under Call controls › Queue membership and Ring group membership to join or leave each queue or ring group you belong to. When a switch is off, you get no calls from that queue, but your other queues aren’t affected.
Your administrator can turn these controls off for you.
Do Not Disturb
Section titled “Do Not Disturb”Click the status in the top-right corner to switch between Available and DND enabled. In a smaller window, click your avatar to find it. With Do Not Disturb on, you get no incoming calls on any of your devices or external numbers, and no notifications.
Settings
Section titled “Settings”Settings has a page for each group of settings:
| Page | What it does |
|---|---|
| General | The Language of the Webphone. In the desktop app, also start-up, headset and phone-link options. |
| User | Your avatar (Upload new avatar), your internal number, and Change password. |
| Defaults | The tab, phonebook and call modes the Webphone opens with. |
| Notifications | Which events show a browser or desktop notification. See Webphone notifications and ringtone. |
| Ringtones | Your default ringtone, and ringtones for calls tagged by your administrator. |
| Audio | The speakers for the ringtone and for calls, and the microphone. Not shown in every browser. |
| Device management | How your devices ring (see below). |
| Integrations | CRM and Zapier integrations, once they’re activated for your account. |
Device management
Section titled “Device management”If you have more than one device, such as the Webphone and a desk phone, you can control how they ring:
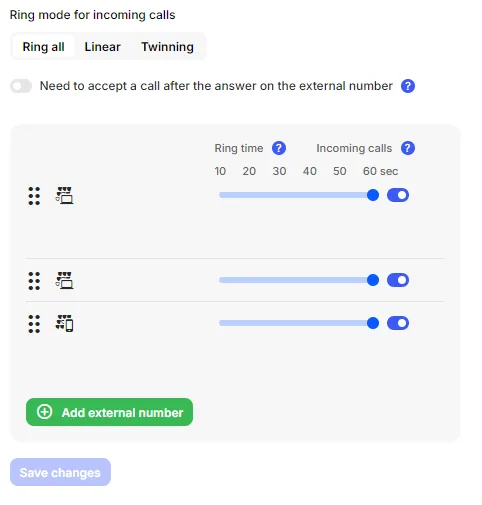
- Ring mode for incoming calls: Ring all, Linear (one after another, in the order shown) or Twinning (the first device, then all the others together).
- Turn off a device’s Incoming calls switch so it stops ringing. Outgoing calls and SMS still work.
- Drag devices to change the order, and click Add external number to ring a mobile as well.
Click Save changes when you’re done.